一、前言
1. 官网下载安装
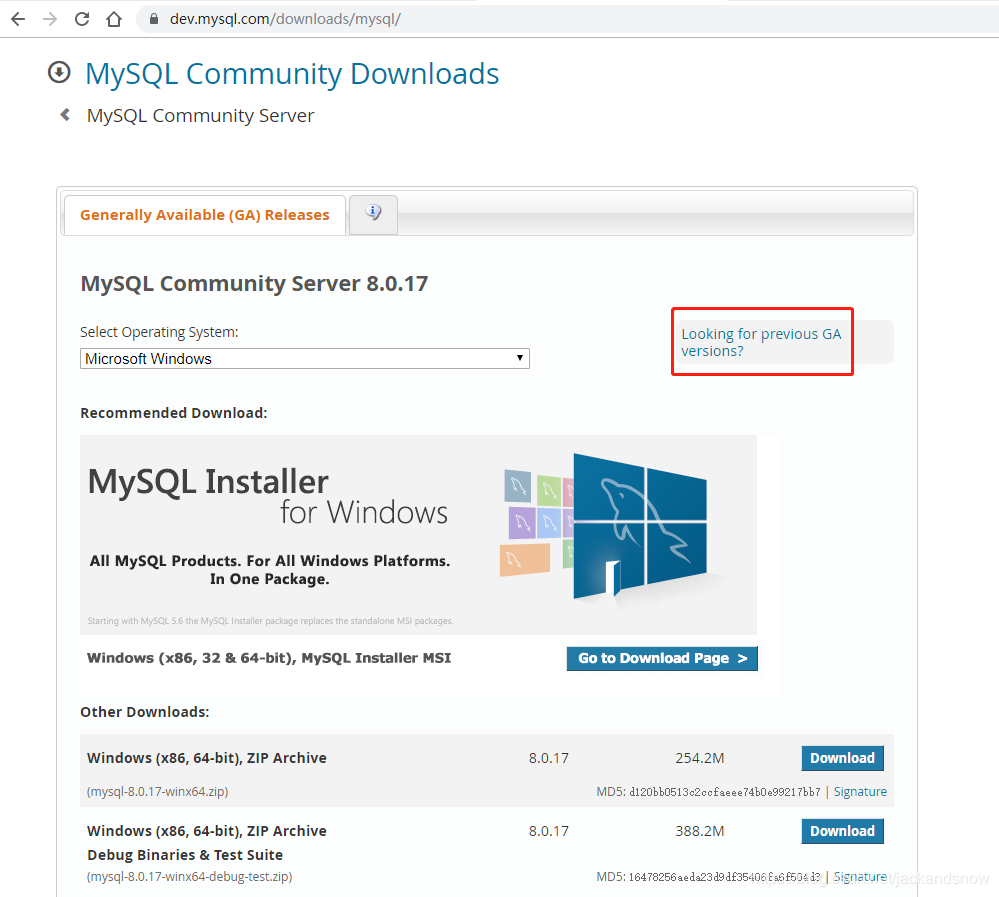
安装MySQL,首先我们想到的肯定是前往官网下载相应的版本安装包进行安装。如下图所示,,MySQL官网提供的是最新版本8.0,这个时候要想下载旧版需要点击右边的 Looking for previous GA versions? 。
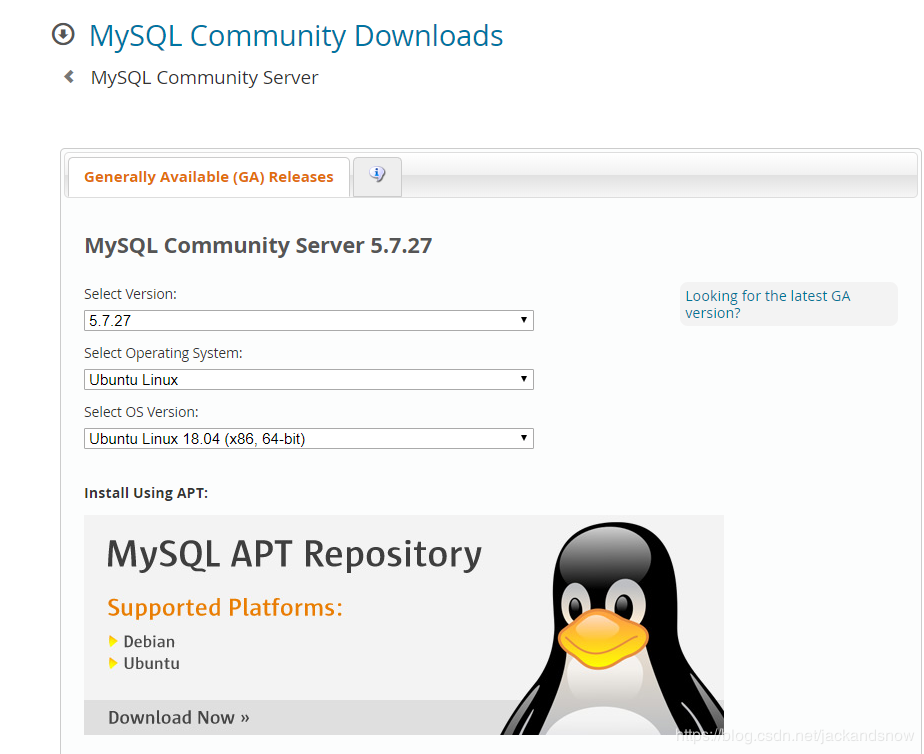
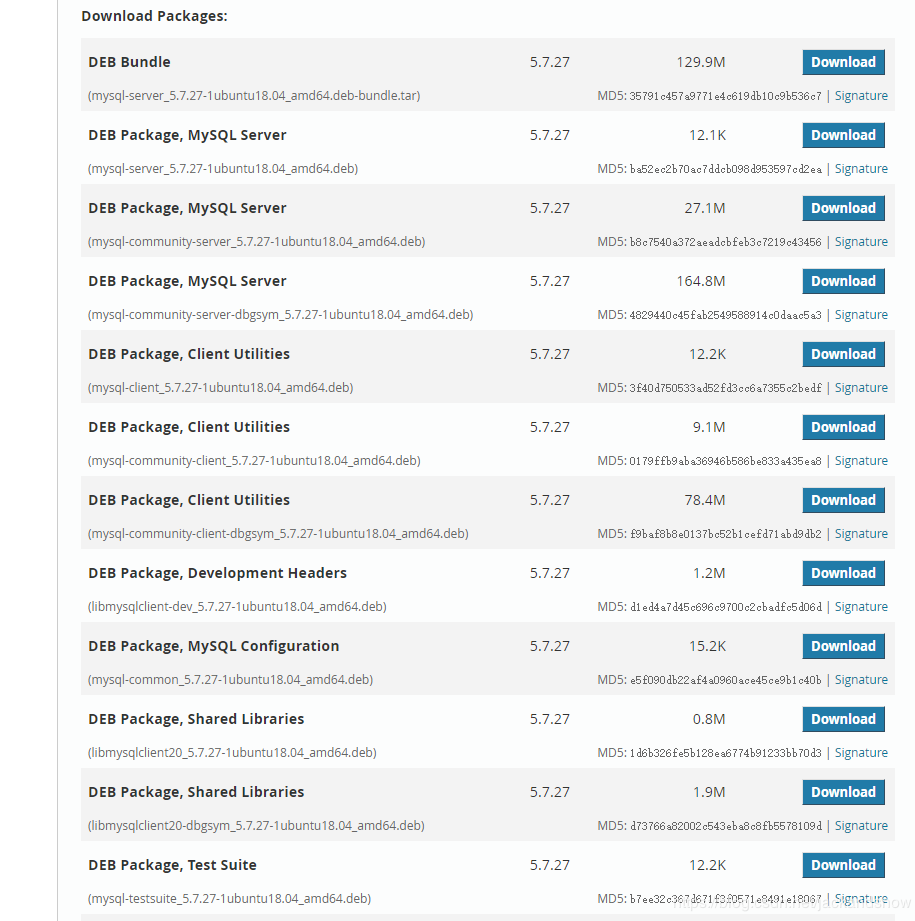
跳转到旧版页面之后,选择要下载的MySQL版本、适用的操作系统及其版本,可以看到下方提供的deb包有很多,而且还是把mysql-server、client等分开的,安装起来是真的复杂难懂。这种方法就不推荐大家使用了。
2. 终端命令安装
在ubuntu终端中执行 sudo apt install mysql-server 命令,默认会安装MySQL 5.7,但是会出现一系列的问题,比如 安装过程中不会提示设置root密码,但是登录MySQL又需要密码,而且还会缺少相关的组件。1
$ sudo apt install mysql-server
所以,不推荐大家使用上面两种方式安装,推荐采用MySQL的APT仓库进行安装。
二、MySQL安装
1. 下载MySQL的APT仓库
点击此处前往下载,如下图所示,点击 Download 即可。
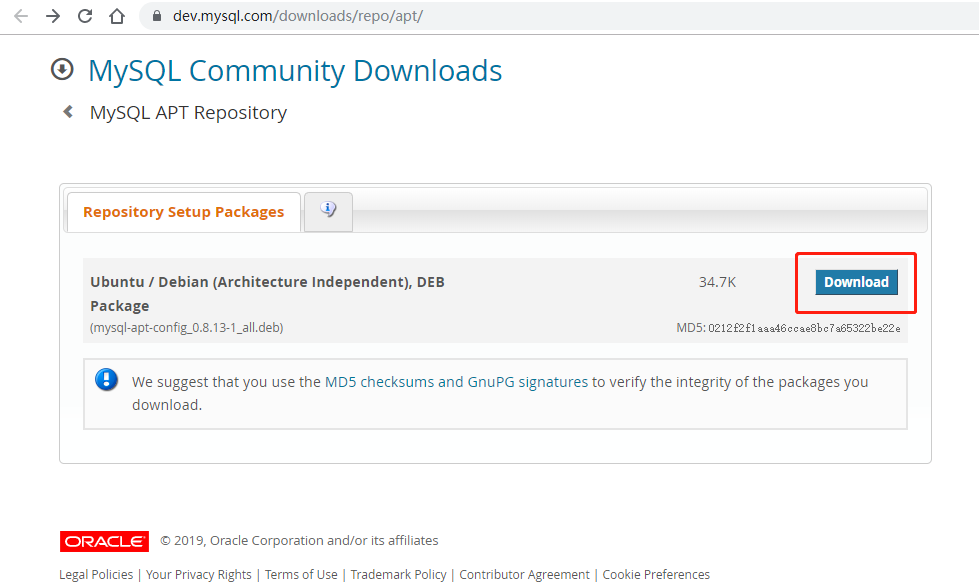
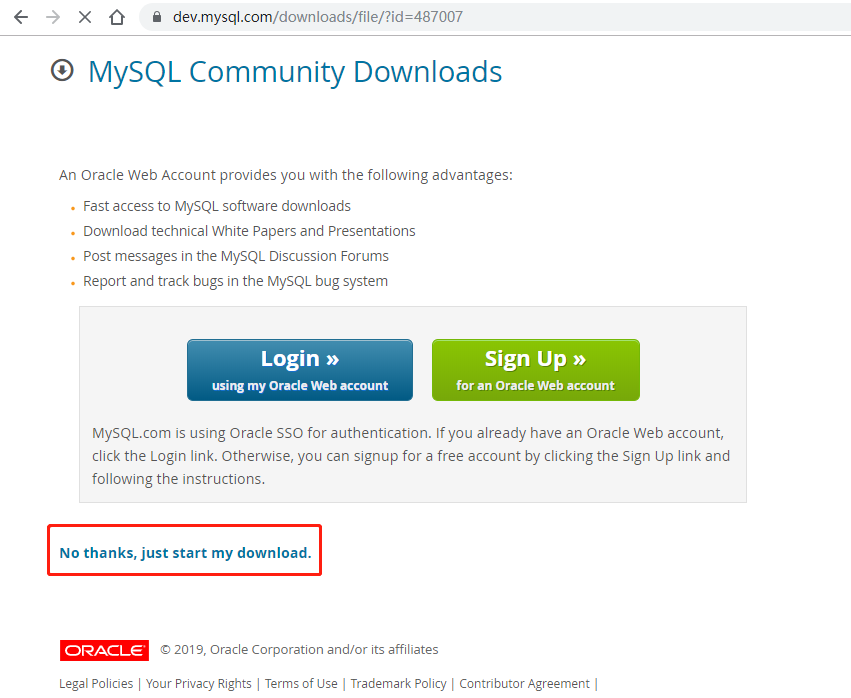
然后会跳转到如下提示注册和登录界面,细心的小伙伴会发现其实不用注册登陆也能下载的,点击下方的 No thanks, just start my download 即可。
如果没有图形化界面,可以使用 wget 命令通过终端来下载,执行下面的命令即可。1
$ wget https://dev.mysql.com/get/mysql-apt-config_0.8.13-1_all.deb
2. 添加MySQL仓库
执行下面的命令进行MySQL的安装,会跳转到下方的选择版本和组件的安装界面。1
$ sudo dpkg -i mysql-apt-config_0.8.13-1_all.deb
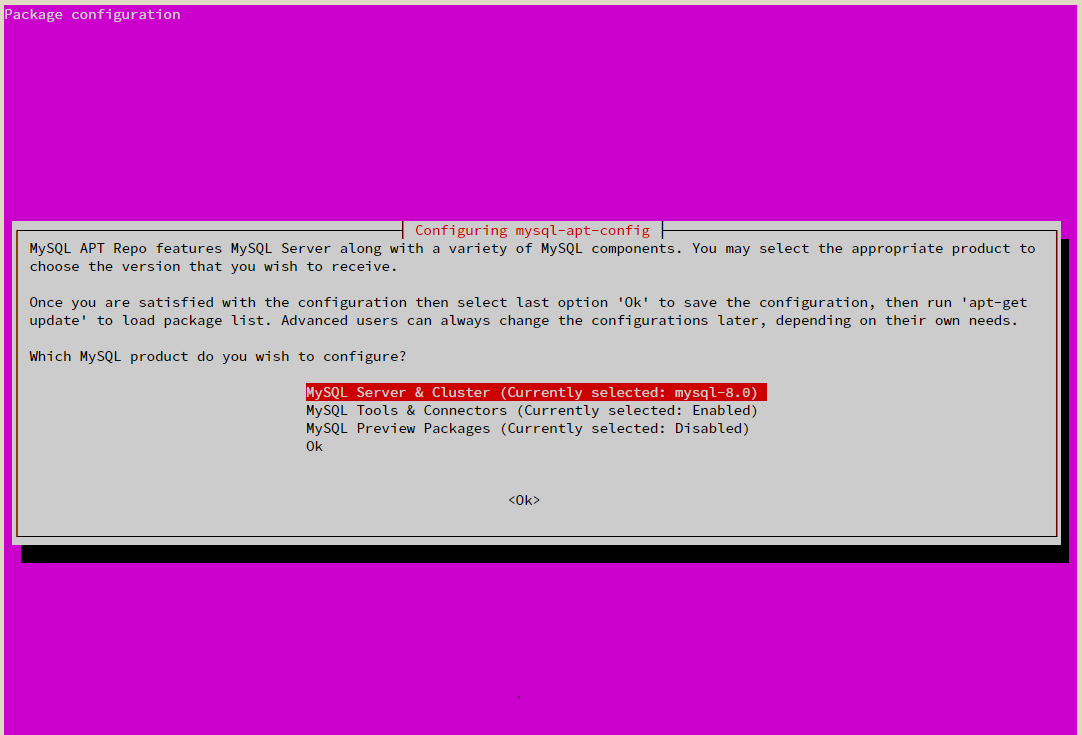
接下来,选择我们要安装的MySQL版本5.7:

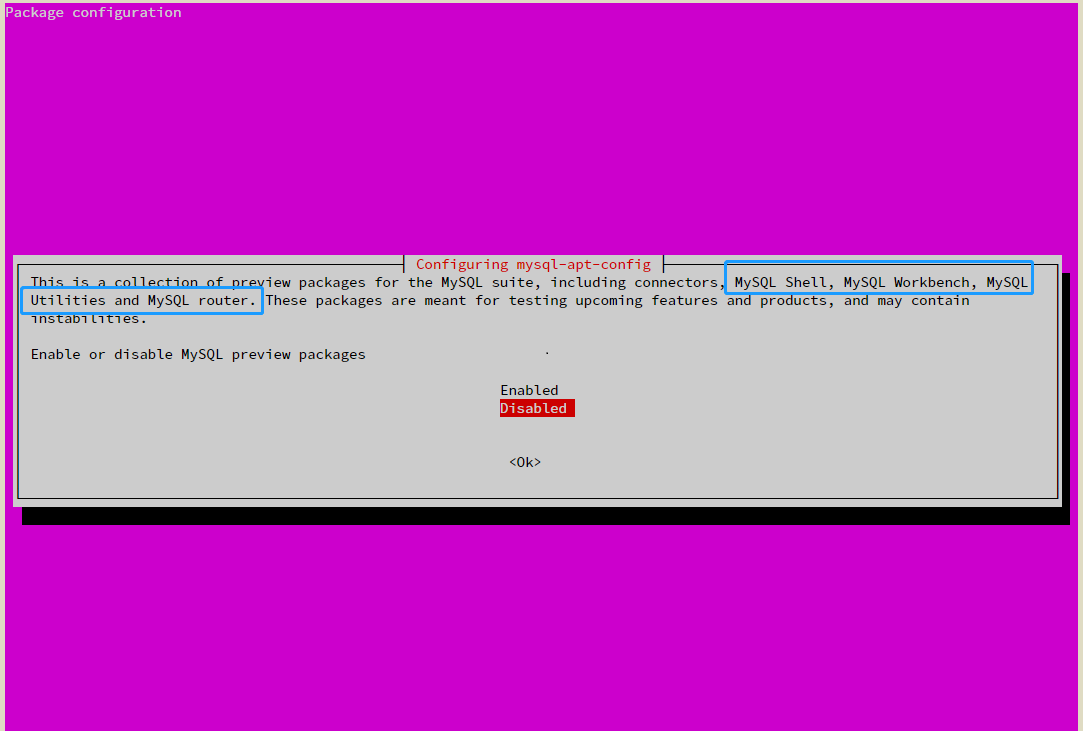
如果ubuntu系统有图形化界面,可以选择安装 MySQL Preview Packages,因为它包含 Workbench 等工具,可以提供类似 Navicat 操作数据库的图形化界面。
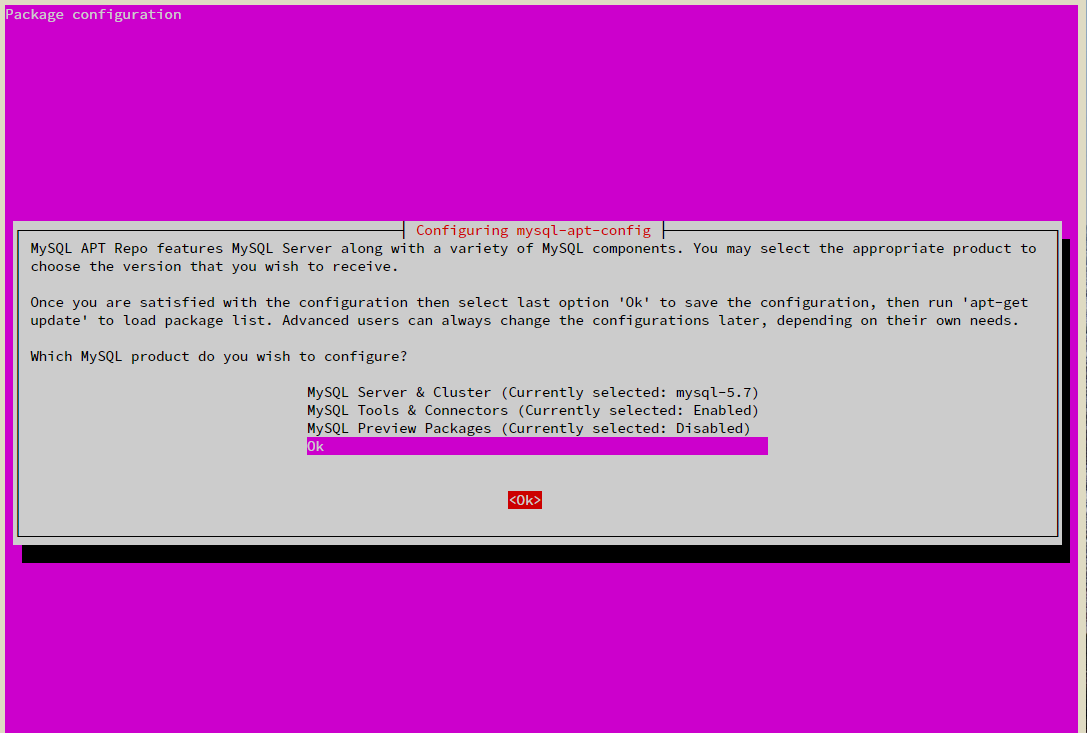
最后选择要安装的版本和相应的组件之后,选择到 OK ,Enter就好。
3. 安装MySQL
在上述的操作中,已经将MySQL 5.7的源成功添加了,所以安装之前需要更新下。1
$ sudo apt update
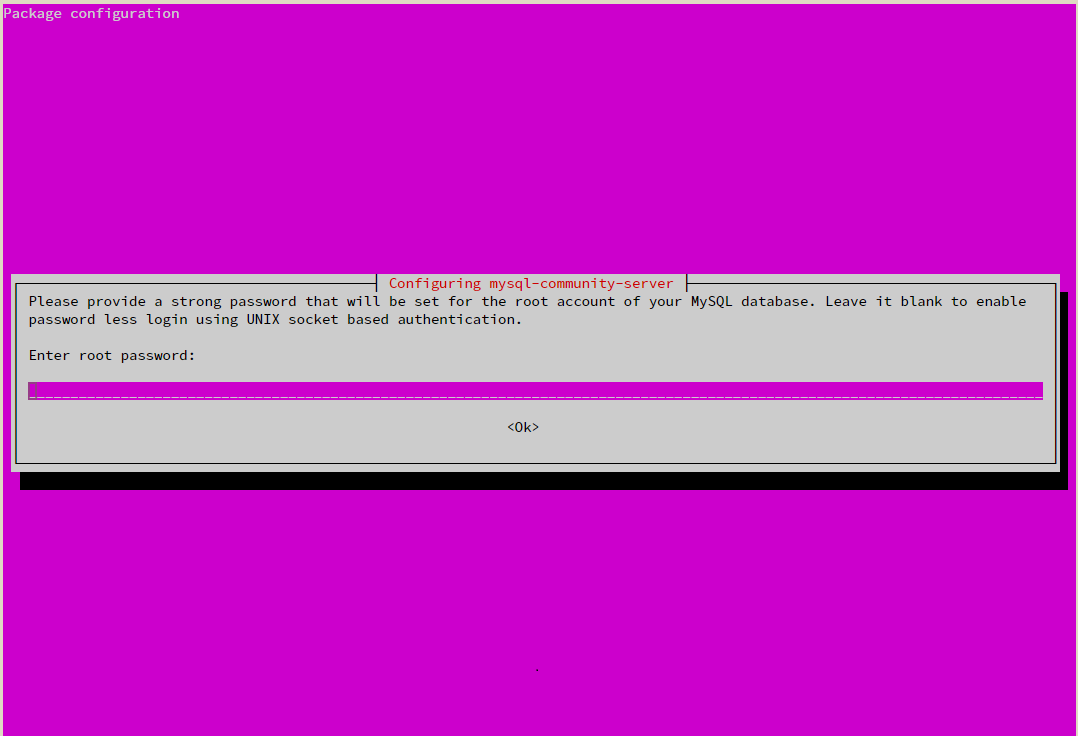
更新完成之后,就可以安装MySQL了,虽然这里同样使用的是 sudo apt install mysql-server 命令,但是通过APT仓库安装的这种方式是能够设置root的密码的。1
2
3
4
5
6
7
8
9
10
11
12$ sudo apt install mysql-server
Reading package lists... Done
Building dependency tree
Reading state information... Done
The following additional packages will be installed:
libaio1 libmecab2 mysql-client mysql-community-client mysql-community-server
The following NEW packages will be installed:
libaio1 libmecab2 mysql-client mysql-community-client mysql-community-server mysql-server
0 upgraded, 6 newly installed, 0 to remove and 8 not upgraded.
Need to get 38.3 MB of archives.
After this operation, 258 MB of additional disk space will be used.
Do you want to continue? [Y/n] Y
接下来就可以设置root的密码了,如下图所示,注意的是这里会再次提示确认密码,所以要输入密码2次。
最后查看MySQL的运行状态,终端执行 sudo service mysql status 。1
2
3
4
5
6
7
8
9
10
11$ sudo service mysql status
● mysql.service - MySQL Community Server
Loaded: loaded (/lib/systemd/system/mysql.service; enabled; vendor preset: enabled)
Active: active (running) since Fri 2019-09-06 21:49:08 CST; 24s ago
Main PID: 1077 (mysqld)
Tasks: 27 (limit: 6143)
CGroup: /system.slice/mysql.service
└─1077 /usr/sbin/mysqld --daemonize --pid-file=/var/run/mysqld/mysqld.pid
9月 06 21:49:07 ubuntu18 systemd[1]: Starting MySQL Community Server...
9月 06 21:49:08 ubuntu18 systemd[1]: Started MySQL Community Server.
三、连接MySQL
1. 本机登录
在终端中执行 mysql -u root -p ,然后输入前面设置的密码,就能成功登录MySQL了。1
2
3
4
5
6
7
8
9
10
11
12
13
14
15$ mysql -u root -p
Enter password:
Welcome to the MySQL monitor. Commands end with ; or \g.
Your MySQL connection id is 2
Server version: 5.7.27 MySQL Community Server (GPL)
Copyright (c) 2000, 2019, Oracle and/or its affiliates. All rights reserved.
Oracle is a registered trademark of Oracle Corporation and/or its
affiliates. Other names may be trademarks of their respective
owners.
Type 'help;' or '\h' for help. Type '\c' to clear the current input statement.
mysql>
2. 设置远程登录
MySQL默认的配置是只能本地登录的,如果是云服务器需要远程登录的话,则需要进行配置。在MySQL控制台中,查看 mysql.user 表中的 user 和 host 字段,可以看到 root 用户默认只能localhost登录。1
2
3
4
5
6
7
8
9
10
11
12
13
14
15
16mysql> use mysql;
Reading table information for completion of table and column names
You can turn off this feature to get a quicker startup with -A
Database changed
mysql> select user, host from user;
+---------------+-----------+
| user | host |
+---------------+-----------+
| mysql.session | localhost |
| mysql.sys | localhost |
| root | localhost |
+---------------+-----------+
3 rows in set (0.00 sec)
mysql>
因此,需要更改 root 用户登录的 host 为任何主机,设置 host 为 % 即可。1
2
3
4
5
6
7
8
9
10
11
12
13
14
15mysql> update user set host="%" where user="root";
Query OK, 1 row affected (0.00 sec)
Rows matched: 1 Changed: 1 Warnings: 0
mysql> select user, host from user;
+---------------+-----------+
| user | host |
+---------------+-----------+
| root | % |
| mysql.session | localhost |
| mysql.sys | localhost |
+---------------+-----------+
3 rows in set (0.00 sec)
mysql>
修改完成之后,需要重启 MySQL 服务。1
$ sudo service mysql restart
最后,在远程主机上执行下面的命令,输入密码连接即可。1
$ mysql -u root -h mysql_host_ip -p

...
...